The speed square is generally a great investment tool to put your money at stake. They are very much affordable yet have various numbers of usefulness. Actually, most contractors make this measuring tool a handy one due to the fact that you can accomplish multiple different jobs. All you need to do is to learn how it works like the way on how to use a speed square to cut rafters.
If you want to know the proper methods of using this measuring tool for the different uses that it entails, you landed on the right track. Aside from the use of the speed square for cutting the rafters, we also have here the other guide in using the speed square for other functions. Now, if you are ready to use this measuring tool, let’s get started below!
What is a Speed Square?
A kind of measuring multi-tool that comes from materials like steel and plastic is the speed square. The other names associated with it are the rafter square and the triangle square. Along with the ruler, protractor, Try square, board ripping guide, line scribing tool, and a saw guide, the speed square is generally a tool commonly used by carpenters. This measuring tool basically makes cuts with 90O and 45O cuts accurately.
Moreover, the following are the main uses of this measuring tool:
- As a quick measurement of perpendicular lines over the edge of the board
- To accurately marks a 45O angles
- Basically looks and marks various common angles easily, most likely the rafter pitches over the roof and the stair stringers angles
Historically, a carpenter within a small town outside Chicago invented the speed square in 1925. Initially, his purpose was to produce a device that determines the pitches over the roof easily. Right after the moment of the speed square’s creation, many carpenters started to ask for another item of this tool.
Different functions of a Speed Square
Generally, a speed square has many different functions which can be used in various applications.
Marking
In the previous paragraphs, we discussed that being a Try square is one of the most common uses of a speed square. Basically, this measuring tool contains a lipped fence running on a right-angled edge. This serves to let you firmly hold the measuring tool against the board. Right in there, scribing a line through the other edge with right-angle can be done easily and accurately.
Moreover, the resulting line will be perfectly perpendicular to the factory edge of the board. In addition, it can be used as a scribing tool to create 45O angles through the tool’s angled edge, such as the base of the triangle.
Measuring
As you would notice, the appearance of the speed square has a traditional English ruler along the right-angled edge of the square. Based on the model that you will be using, it could either be 7″ or 12″ long. Usually, this ruler is the one being used for measuring cuts.
Moreover, underneath the ruler is a triangular cut-out or also known as the scribe bar. This is basically a set of notches with at least ¼ intervals. You’ll only need to hold a pencil along the desired notch and draw the fence through the board edge for you to make an accurate marking.
This is actually an easy way to trim line through the board. Additionally, you can also check the internal angles by using the right angle of the speed square. Usually, it is the accuracy of the internal angles which can be determined.
Saw Guide
Another function of the speed square is guiding the cross-cutting of lumbers within an accurate angle measurement of about 90O or 45O. The right angle or the 45O angle is helpful in fencing for the hand or for the circular saw. Just hold the fence firmly against the board edge.
Protracting
Generally, using the speed square as a protractor necessitates you to look for the Pivot point with the marking at the 90O part of the square. Actually, the bottom of the tool can be pivoted and moved to the desired degree on the similar factory edge. You can do this using the Pivot mark around the board’s factory edge. Moreover, put a marking on the angle ready for cutting out.
Measuring Pitches
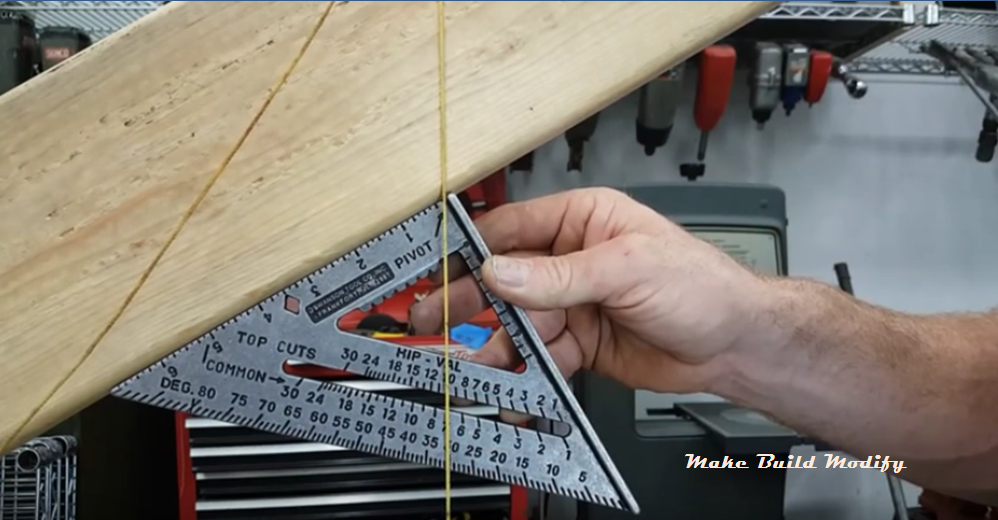
Acting as a protractor and one of its tool missions is to quickly look for the same and different angles of rafter for the pitches over the roof. You can do this by using the main protractor and two special protractor angle guides packed on the inside tool. The “Common” marking is the guide on the top portion of the protractor.
Through it, the indications for the rise for common rafters ranging from 1″ to 30″ are the common pitches over the roofing. Moreover, on top of this guide is the mark called the “HIP-VAL”. The HIP-VAL or “Hip-Valley” defines the rise on a 12″ run for either Hip or Valley-type rafters.
Other Feature: The Diamond Cut
The Diamond Cut is actually one of the cool and patented features of this measuring tool. It is basically a diamond-shaped shaped cut over the edge of the ruler. One of its uses is to square out a line which scribed along with the board. This will then result in making a perfect line of 90O measurement from the scribed angle to the board edge.
Moreover, a speed square can also use as make-do level once you determine it without an appropriate bubble level. For here, you actually need a plumb-bob, yet an improvise one is also possible. You just need a string and an item with a suitable weight.
Different Ways of Using a Speed Square
Now that we learned that there are numbers of functions that a speed square can actually do, we must also expect the different ways of using it. Aside from knowing the way on how to use a speed square to cut rafters, below are the other ways to use it.
The Basic Way
- Initially, place the speed square over the material surface. Make sure that the lip extends on a downward position on the long side of the material.
- Basically, twist the lip far from the edge of the material which is along with the pivot. Keep in mind that the one responsible for moving is the corner of the hypotenuse and the lip and not the pivot.
- Moreover, line up the preferred angle based on the hypotenuse at the similar edge of the pivot.
- In case you are measuring through a pitch of the opposite angles, it is better to line up the preferred pitch based on the common edge and on the similar pivot edge.
- Finally, put a mark through the outside edge of the speed square to cut the angle.
The Way on Marking and Measuring
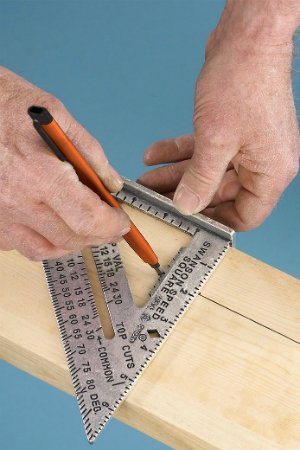
Like what we’ve said, part of the function of the speed square is the scribing of lines. The lipped straight edge that it has gives the angles with measurement of 90O and 45O. This is the step-by-step procedure on using this tool in marking and measuring function.
- Primarily, hold the lip of the speed square pressing on a board.
- Basically, mark a perpendicular angle and a 45O lines by sliding the speed square around it.
- Trim at least 1-1/2″ off the board side.
- Place the pencil over the right notch and draw the lip of the speed square down the board edge.
- Finally, hold the speed square in place and using a circular saw, slide it over the edge of the speed square. This will generally result in a perfect angle of 90O and 45O cuts.
The Way on Protracting and Pitching
Basically, all of the angle markings sit on the bottom edge which makes you use the speed square in looking and marking the angle that you need. With this, you just only need to move the pivot point through the board edge. This will also line up the board edge with the preferred angle.
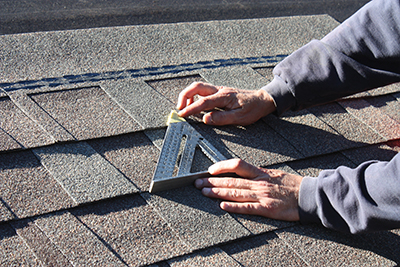
Moreover, in looking pitches and level, place the long side of the tool through the material surface. In addition, hang a plumb-bob on the pivot point. The following step is the detailed instruction on using this measuring tool for pitching the roof.
- Initially, look for the common angle for rafter together with the pitch over the roof.
- Basically, through the spirit level, put a mark on a straight vertical line transverse the rafter. You will then have the plumb line.
- Subsequently, line up the lip of the speed square through the plumb line.
- Align the pivot point over the rafter’s bottom edge.
- Moreover, follow the rafter’s bottom edge in a point that it meets the common pitch measurement.
- Finally, the resulting value measures the pitch of the roof.
For Rafters – Ways on Using a Speed Square
- Initially, place the square over the material’s surface.
- Basically, put markings on the point of the diagonal corner that will produce a line measuring 45O.
- Subsequently, adjust the square to the degree of gradation that is required in lining up the edge through the use of the pivot point.
- Create a pencil line through the square over the material’s surface.
- Moreover, press the square through the edge and put the tip of the pencil on the notch so you can measure the needed inches.
- Maintain the pencil at the notch and slide through the speed square along with the material. This will generally result in a straight line parallel to the edge.
- Place the speed square flatly over the board where you want to cut.
- Finally, slide the saw shoe through the speed square.
Step-by-Step Process on How to Use a Speed Square to Cut Rafters
So, aside from the other ways of using a speed square, here is the way on how to use a speed square to cut rafters.
- Initially, the first thing to do on how to use a speed square to cut rafters is to identify the width and length of the building. Moreover, determine the span of the rafter so you can analyze the number of rafters needed. After that, also determine the pitch.
- Looking at the rafter’s run by dividing the span of the rafter by two is the next step on how to use a speed square to cut rafters.
- Moreover, put a mark over the plumb as part of the way on how to use a speed square to cut rafters.
- Subsequently, place the pivot point on the location of the square’s straight edge that meets the side of the lip over the top edge of the rafter board.
- Afterwards, the next way on how to use a speed square to cut rafters is rotating the square until lining up the correct pitch on the edge of the board.
- Through the other side of the square, draw a line right down the board side. This is actually the next step on how to use a speed square to cut rafters.
- As part on how to use a speed square to cut rafters, you will then need to create another ¾ inch cut from plumb. This will permit the two-inch ridge board to meet rafters.
- Generally, check for the rafter table speed square manual and look for the length of the rafter.
- Finally, look for the birdsmouth joint at the speed square instruction manual.
Final Thoughts
A speed square is a measuring tool that has lots of different functions. And, each function also has a specific process of using this multi-tool. One of which is the way on how to use a speed square to cut rafters. Generally, following the step-by-step guide provided may be a great help to successfully make a perfect cut. So, what are you waiting for? Grab your speed square and practice to use it to cut rafters.
