As a DIY enthusiast, I’m always looking for creative ways to repurpose everyday items and give them a new lease on life. One such project that has captured my imagination is transforming ordinary glass bottles into decorative pieces, planters, or even unique lighting fixtures. While drilling holes in bottles is a popular method, not everyone has access to a drill or feels comfortable using one. That’s why I’ve put together this handy guide on how to put holes in glass bottles without drills.
In this post, we’ll discuss four different drill-free methods for putting holes in glass bottles: using a hot screwdriver, hammer and nail, Dremel tool, and blowtorch. We’ll also cover safety tips to remember when using these tools. So, let’s dive in and explore the world of glass bottle crafting together.
Supplies You’ll Need
Before we delve into the details of creating holes in the glass without a drill, gathering all the necessary supplies is essential. Having the right tools at hand will make the process smoother and ensure your safety.
🍾Glass Bottle (Clean and Dry)
The first item you’ll need is, of course, the glass bottle itself. Choose a bottle with a size and shape that suits your project. For example, consider using a wine bottle with a larger opening if you’re making a hanging planter. Ensure the bottle is clean and dry before starting, as residue or moisture may interfere with the cutting process.
🍾Safety Goggles and Gloves
Safety should always be a priority when working with glass. Wearing safety goggles protects your eyes from small shards that might break off during cutting. Gloves, preferably cut-resistant, will help protect your hands from potential cuts or scratches while handling the glass.
🍾Masking Tape or Duct Tape
Masking or duct tape is essential for providing a stable surface to mark your cutting line. It also helps prevent chipping and cracking while scoring the glass. Choose a tape that adheres well to the glass, ensuring it stays in place throughout the process.
🍾Glass Cutter or Carbide Scribe
You’ll need either a glass cutter or a carbide scribe to score the glass. Both tools are designed for cutting glass and provide cleaner, more precise cuts than improvised alternatives. A glass cutter is a handheld tool with a small, sharp wheel at the end, while a carbide scribe has a sharp, pointed tip made of tungsten carbide.
🍾Candle and Ice Cubes (for the Thermal Shock Method)
The thermal shock method requires a heat source and a cooling agent. A candle serves as an ideal heat source, allowing you to heat the scored area of the glass evenly. On the other hand, ice cubes provide rapid cooling, crucial for creating the thermal shock necessary to break the glass along the score line.
Step 1: Prepare the Bottle
Before cutting holes in your glass bottle, it’s crucial to prepare it properly. A well-prepared bottle ensures a smoother cutting process and minimizes the risk of accidents.
Cleaning and Drying the Bottle
To achieve the best results, working with a clean and dry glass bottle is important. Any residue, dirt, or moisture can interfere with cutting and compromise the outcome. Follow these steps to clean your bottle effectively:
- Remove any labels or stickers from the bottle. If they’re difficult to peel off, soak the bottle in warm, soapy water for an hour to loosen the adhesive. You can also use baking soda and cooking oil to remove stubborn residue.
- Thoroughly wash the bottle, inside and out, using a brush and dish soap. Ensure you remove all remaining residue, dirt, and oil.
- Rinse the bottle well to remove any soap.
- Allow the bottle to air dry completely, or use a clean cloth to dry it, ensuring there’s no moisture left inside or on the surface.
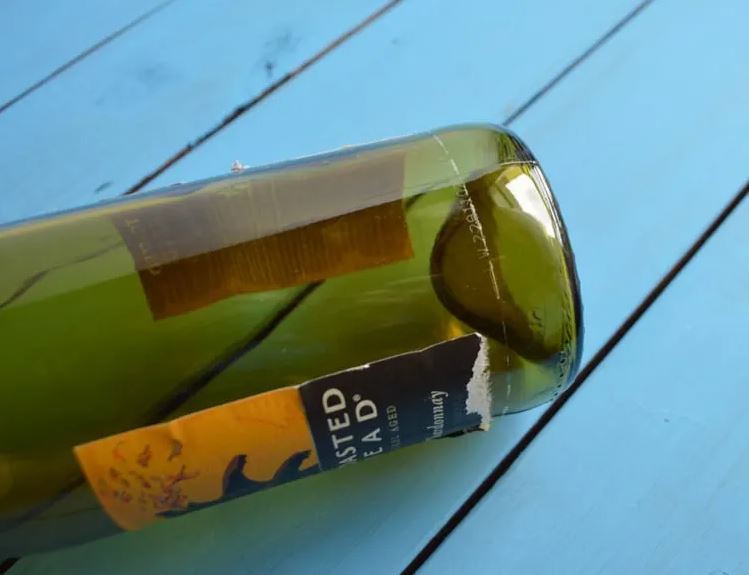
Applying Tape to the Cutting Area
Once your bottle is clean and dry, it’s time to apply tape to the cutting area. This step is essential for providing a stable surface to mark your cutting line and preventing chipping or cracking during the scoring process. Here’s how to apply the tape correctly:
- Choose either packing tape or duct tape, depending on your preference. Both options will provide adequate support and protection for the glass.
- Measure and cut a strip of tape long enough to wrap around the bottle’s circumference where you want to create the hole.
- Carefully apply the tape around the bottle, ensuring it’s straight and smooth, without any wrinkles or air bubbles. It will help you achieve a clean, even cut.
- Use a pen or marker to draw a circle on the tape, indicating the exact size and location of the hole you want to create.
With your bottle properly prepared, you can move on to the next step: scoring the glass.
Step 2: Score the Glass
Now that your bottle is ready, it’s time to score the glass. Scoring involves creating a shallow, controlled cut along the surface of the glass, which will guide the subsequent breaking process.
Scoring the glass requires a steady hand and careful attention to detail. Follow these steps to create a perfect circle using either a glass cutter or carbide scribe:
- Choose your cutting tool: A glass cutter features a small, sharp wheel at the end, while a carbide scribe has a sharp, pointed tip made of tungsten carbide. Both tools help in cutting glass and provide clean, precise cuts.
- Hold the bottle securely in one hand, or place it on a stable, non-slip surface. Make sure the taped area is easily accessible and visible.
- Position your cutting tool on the tape at the edge of the marked circle (if you drew one). Apply consistent pressure as you begin to score the glass. Be careful not to press too hard, as this may cause cracks or chips in the glass.
- Slowly and steadily, trace the entire circumference of the circle with your cutting tool, maintaining even pressure throughout. Completing the circle in one continuous motion is crucial, as stopping or changing direction may result in an uneven cut.
- Once you’ve scored the entire circle, double-check your work to ensure the line is continuous and even. If necessary, carefully review any gaps or inconsistencies in the scored line.
By following these steps, you’ll create a clean, precise circle on the surface of your glass bottle, setting the stage for the thermal shock process that will help you achieve a perfect small hole. Remember, patience and attention to detail are essential during this step, as they will significantly impact the outcome of your project.
Step 3: Heat and Cool the Glass
With the glass scored, it’s time to employ the thermal shock method to break the glass along the scored line. This technique involves heating and cooling the glass rapidly, causing it to contract and cleanly break where it has been scored.
The key to a successful thermal shock process is carefully applying heat and cold to the scored area. Follow these steps to achieve a clean break:
- Light a candle and position it on a stable, heat-resistant surface. The candle flame will be your heat source for the thermal shock process.
- Hold the bottle securely in one hand or place it on a non-slip surface, ensuring the scored area is easily accessible.
- Slowly rotate the bottle over the candle flame, focusing the heat directly on the scored line. Keep the flame safe from your fingers and any flammable materials. Maintain a consistent speed while rotating the bottle to ensure even heat distribution along the scored line.
- After heating the scored area for approximately 30 seconds to a minute (or until the glass feels warm to the touch), quickly but carefully apply an ice cube to the heated section. This rapid cooling will cause the glass to contract and create stress along the scored line, initiating the breaking process.
- Continue heating and cooling the scored area until the glass separates along the line. It may take several heating and cooling cycles, so be patient and persistent.
Remember that the process requires patience and careful attention to detail, as rushing or applying uneven heat can result in an imperfect break or damage to the bottle. With practice, you’ll master this technique and create flawless holes in bottles without a drill.
Step 4: Remove the Circle
After successfully employing the thermal shock method, the glass circle within the scored line should be ready to separate from the bottle. This step requires careful handling to ensure a clean removal and prevent damage to the rest of the bottle.
Removing the glass circle can be a delicate process, but you can achieve a clean separation with the right technique. Follow these steps to remove the circle using pliers:
- Choose a pair of pliers with a flat, smooth gripping surface, such as needle-nose or flat-nose pliers. It will help prevent damage to the remaining glass while removing the circle.
- Put on your safety goggles and gloves if you haven’t already, as small shards of glass may break off during this step.
- Carefully examine the scored area to ensure the glass has separated along the line. Repeat the heating and cooling process to further weaken the bond if there are any spots where the glass is still connected.
- Gently insert the pliers’ tips into the hole, positioning them on opposite sides of the circle. Apply gentle, even pressure to pry the circle away from the bottle. Be cautious not to squeeze too hard or twist the pliers, as this could cause damage to the bottle or shatter the glass.
- As the circle separates from the bottle, apply gentle pressure with the pliers, working around the circumference until you remove the entire circle.
You can remove the glass circle cleanly and safely, leaving behind a perfectly shaped hole in your glass bottle. With the circle removed, you’re one step closer to completing your project and enjoying the fruits of your labor. Remember, patience and a gentle touch are key during this step, as rushing or applying too much force can lead to accidents or damage to the bottle.
Step 5: Sand the Edges
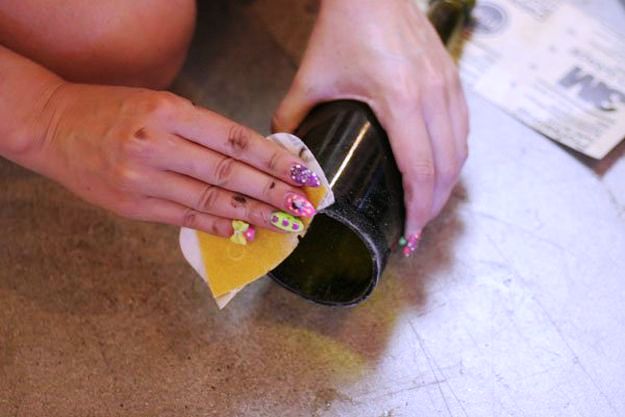
With the glass circle removed, you’re almost done with your project. However, it’s crucial to address the sharp edges of the hole to ensure safety and create a polished, professional look.
Sanding the edges of the hole is essential to prevent cuts and injuries while handling the finished project. Follow these steps to achieve smooth, rounded edges:
- Choose an appropriate abrasive tool for sanding the glass edges. Options include sandpaper (with a grit of 150 or higher), a glass file, or a diamond hand pad. The choice depends on your preference and the tools you have available.
- Put on your safety goggles and gloves, as sanding may produce fine glass particles that can be harmful if inhaled or come into contact with your eyes.
- Hold the bottle securely in one hand or place it on a stable, non-slip surface. Make sure the edge of the hole is easily accessible.
- Begin sanding the edges of the hole using your chosen abrasive tool, applying gentle pressure, and moving in a circular motion. Be patient and work slowly to avoid damaging the glass or creating uneven edges.
- As you sand, periodically check the edges to ensure they are becoming smooth and rounded. Continue sanding until you eliminate all sharp points and the edge has a consistent, smooth curvature.
- After sanding, clean the bottle thoroughly to remove any remaining glass dust or particles. Rinse the bottle with water and dry it completely before proceeding with your project.
Smooth, rounded edges enhance the overall aesthetic and ensure that your finished piece is safe to handle and enjoy. With the sanding complete, you can move on to the final stages of your project, whether it’s decorating, assembling, or displaying your beautiful, repurposed glass bottle creation.
Frequently Asked Questions
Q: How can I ensure my safety while cutting glass bottles?
A: Cutting glass bottles can be a fun and creative way to repurpose them, but it can also be dangerous if you don’t take proper safety precautions. One of the most important things to remember is to wear safety goggles. It will protect your eyes from any flying shards of glass.
Additionally, cutting slowly and deliberately can help prevent slips and accidents. Investing in a bottle cutter can also help make the process smoother and less risky. Most importantly, be patient and take your time. Rushing through the task can lead to mistakes and potentially harmful mistakes.
Q: Can I use other tools instead of a glass cutter or carbide scribe?
A: If you’re looking to cut glass bottles without using a glass cutter or carbide scribe, you can try other tools and methods. For example, some people have successfully used a Dremel rotary tool with a diamond cutting wheel or a tile saw blade. Others have used a string and nail polish remover to cut the glass.
However, it’s important to note that these alternatives may not be as precise or efficient as a glass cutter or carbide scribe and may also come with safety risks. Researching and proceeding cautiously when cutting glass with any tool is important.
Q: What if the circle doesn’t separate after the first thermal shock?
A: If the glass circle doesn’t separate after the first thermal shock, you may need to repeat the process until it does. Start by submerging your bottle in hot water for 1-2 minutes, then quickly move it to a sink filled with cold water.
Repeat this process 2-3 times, and you should be able to achieve separation of the circle from the bottle. Be patient, as rushing could lead to accidents or damage to the bottle.
Q: How do I prevent cracks or chips in the glass while cutting?
A: Prevent cracks or chips in the glass while cutting by taking time and being patient. Make sure you apply pressure slowly to the bottle, which will help prevent the blade from slipping or chipping.
Additionally, investing in a quality bottle cutter and using fresh blades is key to ensuring a clean cut without cracks or chips. Finally, if you’re using a Dremel or other hand tool, adjust the speed to be appropriate for the glass. Doing so will help to reduce the risk of glass chips and cracks.
Final Thoughts
Learning how to put holes in glass bottles without drills has been an incredibly rewarding experience for me, and I hope this guide has inspired you to embark on your glass bottle projects. With the right tools, patience, and attention to detail, you can transform ordinary glass bottles into stunning decorative pieces, planters, or lighting fixtures that reflect your creativity and care for the environment.
As a fellow DIY enthusiast, I encourage you to embrace this technique and explore its endless possibilities for repurposing and upcycling glass bottles. Remember, the key to success lies in careful preparation, patience, and prioritizing safety throughout the process. With practice and perseverance, you’ll master this skill and create beautiful, functional pieces that showcase your craftsmanship and resourcefulness.
Let us know in the comments below if you have any questions or tips for putting holes in glass bottles without drills. We’d love to hear your feedback and experiences.

