Cutting patterns is one of several abilities needed to master the craft of cutting. Any sewing amateur or expert will find a rotary cutter an invaluable tool for cutting through numerous layers of cloth precisely and quickly. Instead of using typical scissors, a rotary cutter with a circular blade that rotates enables smooth and precise cuts through various materials, including cloth and paper.
In this article, we’ll go through how to use a rotary cutter to cut patterns properly so that you can take your sewing projects to a new level of precision and efficiency. So let’s explore the realm of seamless pattern cutting by grabbing our rotary cutters, getting our fabrics ready, and starting. Keep reading to learn more!
What Is a Rotary Cutter?
A rotary cutter is a tool that is often used to cut paper, fabric, or other materials in sewing, quilting, and crafts. It has a handle and a rotating, circular blade that turns in response to pressure. The blade is quite sharp and can easily and accurately cut through different kinds of cloth. The most popular rotary cutter sizes are 45mm and 60mm blades. Rotary cutters come in a variety of sizes. Usually composed of high-quality steel, the blade is simple to replace as it gets dull.
The fabric or material is placed on a cutting mat, the ruler or template is positioned to the appropriate measurement, and the rotary cutter is moved along the edge of the template or ruler. As you roll the material through the rotary cutter, the circular blade slices through it, producing precise cuts.
Because they make it possible to quickly and accurately cut numerous layers of fabric at once, rotary cutters are famous among quilters and sewers because they involve less time and effort than scissors. They may also be used in various creative projects to cut elaborate forms, curves, or straight lines. However, because of their sharp blades, rotary cutters must be handled carefully to prevent mishaps or injuries.
Steps on Cutting Patterns Using Rotary Cutter

Cutting patterns using a rotary cutter may be a quick and accurate way to cut cloth. The following steps will show you how to operate a rotary cutter efficiently:
Assemble your Materials
A rotary cutter, a cutting mat that heals itself, pattern paper, & fabric are required.
Set up Your Work Area
To work on, prepare a spotless, level surface. Put the cutting mat on top to prevent damage to your table or surface.
Get Your Fabric and Pattern Ready.
Make sure your cloth is smooth and wrinkle-free when you lay it flat on the cutting mat. With the help of pattern weights or pins, arrange your pattern paper on top of the cloth.
Pick the Appropriate Blade.
Different blade designs and sizes are available for rotary cutters. Choose a blade that is compatible with the kind and thickness of your cloth. A typical blade selection for regular cloth cutting is a 45mm blade.
Adjust the Rotary Cutter
The blade may usually be locked or unlocked using a safety mechanism on rotary cutters. Make sure the blade is visible and prepared to cut. To lengthen or unlock the blade, according to the manufacturer’s instructions.
Align Your Rotary Cutter
Hold the rotary cutter firmly and set it so that it is 90 degrees from the pattern’s edge. The rotary cutter’s edge should be lined with the pattern line you wish to cut.
Use Moderate Pressure
Maintaining it stable and parallel to the pattern line, gently push downward on the rotary cutter. Keep pushing tight since doing so might cause the cloth to expand or move.
Cut Following the Design.
Smoothly and continuously move the rotary cutter along the pattern line. Throughout the cutting operation, hold the cutter firmly and keep your fingertips away from the blade.
Repeat as Necessary
Once all the appropriate parts are cut out, keep cutting following the pattern lines. Take your time & keep your accuracy high as you make each cut.
Get Rid of Extra Fabric
Remove any extra fabric from the cutting surface once all the pattern pieces have been cut out.
Remember that rotary cutters are sharp instruments, so use them with care. Always follow the directions the manufacturer provides for the particular type of rotary cutter, and take the necessary safety precautions to prevent mishaps when cutting.
Effective Use of Rotary Cutter

A rotary cutter is a multipurpose instrument used often in sewing, quilting, and craft projects to cut paper, fabric, and other materials precisely. It has a handle and a rotatable circular blade that you move around the area you wish to cut. The following steps will show you how to operate a rotary cutter efficiently:
Choose the Proper Blade
Blade diameters for rotary cutters generally range from 28 to 60 millimeters. The thickness of the items you’re cutting determines the blade size you use. Larger blades work better for straight lines & heavier textiles, while smaller blades are better for complex cuts and curves.
Workspace Preparation
Make sure your cutting surface is smooth and clean. It is advised to cut using a self-healing cutting pad below the material. This mat shields the work area and cushions the blade, preserving it for longer use.
Measure and Mark
Mark the required measurements on the material using a ruler or measuring tape. You may use a fabric marker to create a line or little dots depending on your desire.
Material Positioning
On the cutting mat, spread out the material you wish to cut. For precise cutting, remove any creases or folds.
Properly Hold the Rotary Cutter
Hold the rotary cutter handle firmly while applying downward pressure with your index finger lying on top of the cutter.
Begin Cutting
Set the rotary cutter blade’s edge parallel to the designated line or reference point. Hold the blade at a little inclination (often about 45 degrees) to guarantee a smooth cutting action. Push the rotary cutter beyond your body with a smooth, uniform motion while applying little pressure. Allow the blade’s sharpness to accomplish the cutting rather than trying to push it through the material.
Maintain Cutting
Keep your cutting speed steady and precisely follow the designated line. When cutting a curve, rotate the material while keeping the blade’s cutting line aligned.
Change Blade Direction if Needed
To maintain a comfortable and precise cutting angle while cutting a long straight line, you may need to adjust your position or that of the material. Turn the rotary cutter around, position the blade in line with the cutting line, & then lift it off the material to resume cutting.
Safety Measures
Use rotary cutters carefully at all times. Since the blades are so sharp, improper handling might result in injury. When not in use, retract a blade or put the rotary cutter in a secure location. Keep your fingers out of the cutting path.
Maintain and Clean
Use a gentle towel to clean the blade after use to remove any fabric or dirt. To achieve accurate and clean cuts, check whether the blade needs to be replaced if it gets dull over time. Before beginning your real project, practice utilizing a rotary cutter on fabric or paper scraps to acquire confidence and control.
Cutting Fabrics with a Rotary Cutter
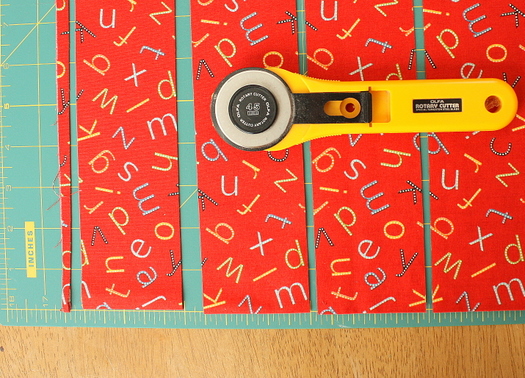
Most rotary cutting work utilized in modern quilt designs, notably strip-pieced quilting projects, begins with the rotary cutting of long strips of cloth. Strips may be sub-cut into different patchwork forms as desired. For quilts & quilt blocks to turn out well, rotary cutting must be precise. Before cutting more costly quilting materials, novice quilters may save money by experimenting with cheap muslin or textiles.
Most of the quick-pieced quilt designs teach you to rotary cut lengthy fabric strips across the textile’s crosswise grain, through selvage to selvage, and we’ll go through how to do that in this article. Longer strips may be used after you are experienced working with shorter ones, and fabric strips that are cut with the fabric’s less flexible longitudinal grain also work well. Here are the equipment and material needed.
▪️Rotary Cutter
▪️Fabric
▪️Quilting Square Ruler
▪️Long Quilting Ruler
▪️Cutting Mats
Square Up A Fabric
It’s crucial to square up one of the ends of the cloth before making the lengthy strips needed for a quilt design with a rotary cutter. The leading edge must be 90 degrees from the fold after squaring up. Fold the fabric lengthwise, with selvages facing one another. There should be no pull lines and a straight bolt fold. If not, undo the bold fold & refold it with matching and parallel selvages.
To make the cloth four layers deep, you might need to fold it twice lengthwise if you use a tiny rotary cutting mat. Lay the cloth on the cutting mat, fold it close to the bottom edge, and square the left side. If your cutting mat is not lined, utilize a square rotary ruler to align the fold with one of the mat’s horizontal lines or a square ruler if it is. The left edge of the square ruler should be about where you will create your square cut but within the left edge of the cloth.
Place a long rotary ruler flush over the square ruler to the left of the first ruler and on top of the fabric’s leading edge. A horizontal line for each ruler should be parallel to or perfectly aligned with the fold.
Get rid of the square ruler. Roll a rotary cutter down the ruler’s right edge from bottom to top while keeping your palm firmly in the ruler’s vertical center. Spread your fingers wide to grasp the ruler firmly, but watch out to prevent fingers from getting in the cutter’s way. A commercial device like the RuleSteady may assist in preventing cloth sway and safeguarding your hand. Now, the folded edge of the cloth should be at a 90 degrees angle to the cut edge.
Cut Long Strips
It is time to rotary cut the textile strips needed for your project now that the edge has been squared up. Place the mark on the lengthy ruler, which corresponds to the required width of the strip at the fabric’s left edge. Verify that it lines up evenly throughout the ruler’s length. Verify that a horizontal line at the ruler’s bottom aligns with the fold. For instance, use the ruler’s Three-inch mark to create a three-inch wide strip. Use the rotary cutter to cut along the ruler’s right side.
After repeated cuts, it is common for the fabric’s leading edge to no longer be square. For exact strips, square up as frequently as required. Before making each cut, verify that the fabric’s left and bottom edges align with the ruler’s vertical and horizontal lines. If not, square up the end once more before cutting extra strips.
Cutting Segments
A horizontal rule should align with the bottom edge of your rotary ruler when you place it close to the correct end of a cut strip. To square up the strip, cut along the ruler’s right edge. As you cut the initial fabric strips, flip the strip over and cut segments along its left edge, lining up the strip with the ruler’s lines as necessary for each form.
Cutting Bias
Quilt binding and appliqued forms like a flower stem that can be readily bent into elegant curves often employ long bias strips. Place a long rotary ruler so the 45-degree mark is parallel to the bottom of the fold in the cloth. Cut along the ruler’s right edge while maintaining your position. Set your ruler’s proper line in line with the fabric’s angled edge and 45-degree line along the fold. Repeat the rotary cut along the ruler’s right side. Repeat this process until you have all the bias strips needed for your quilt project.
Advantages of Using Rotary Cutter to Cut Patterns
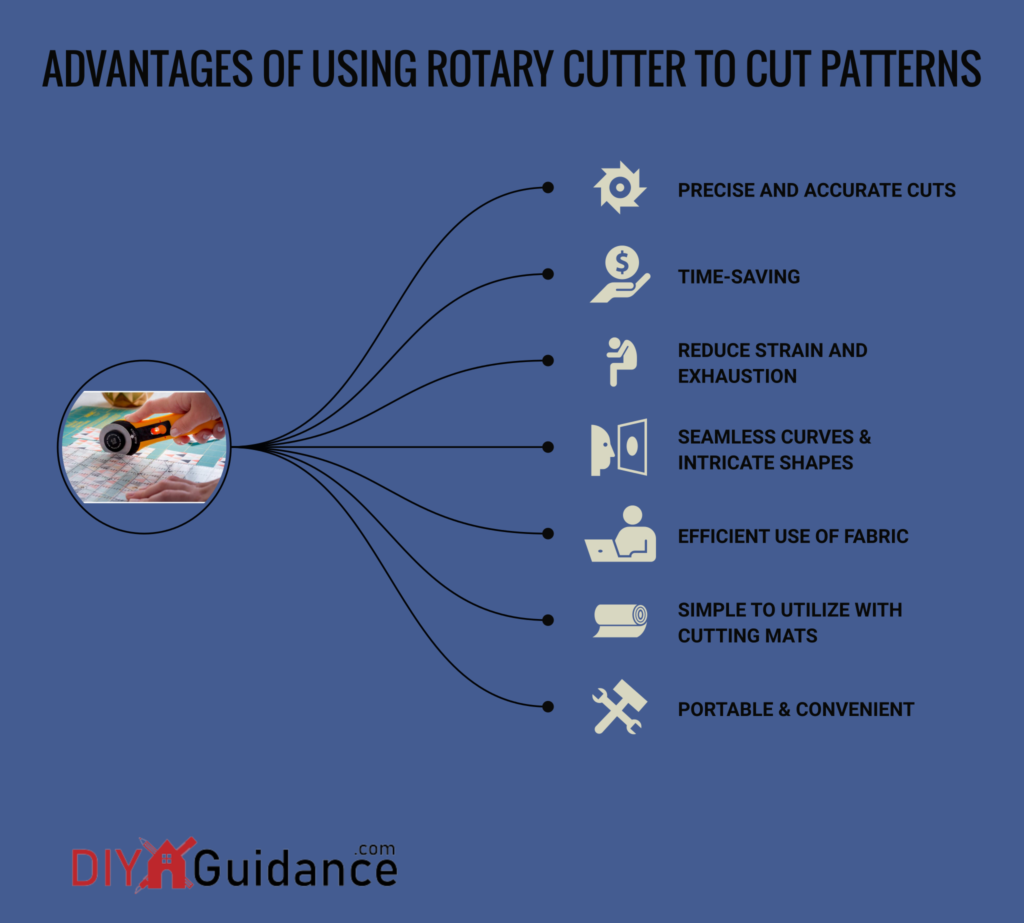
When cutting patterns for sewing & quilting projects, rotary cutters provide several advantages over conventional scissors or other cutting instruments. A rotary cutter has the following advantages:
Precise and Accurate Cuts
Rotary cutters use a fine circular blade that glides easily over the cloth. This makes it possible to make precise cuts that produce pattern pieces with smoother edges and more precisely defined shapes.
Time-Saving
Rotary cutters are quicker than scissors when cutting through many layers of cloth. When working with sewing or quilting projects, the rolling movement of the blade enables quick and effective cutting, saving you significant time.
Versatility
Numerous varieties of cloth, including fragile and slippery ones and layers of fabric, may be cut using rotary cutters. They are useful for various sewing & quilting applications because of their adaptability.
Reduce Strain and Exhaustion
Rotary cutters don’t need to be squeezed or used in a repeating manner as scissors do. It is more pleasant to use for long periods because of the rolling movement of the blade, which lessens stress on your hand and wrist. Those who have arthritis or other hand movement limitations may find this to be very helpful.
Seamless Curves & Intricate Shapes
Rotary cutters are perfect for cutting delicate forms like scallops, appliqué patterns, and supple curves. The ability to turn the cutter while keeping it in touch with the cloth enables precision cutting along curved lines, producing final items that are smoother and more appealing.
Efficient Use of Fabric
Rotary cutters’ accuracy contributes to reducing cloth waste. By making precise cuts, you may maximize the use of your fabric and minimize the number of scraps left behind, thus saving money on supplies.
Simple to Utilize with Cutting Mats
Normally, self-healing cutting mats are used in combination with rotary cutters. These mats provide a steady cutting surface and safeguard your work area from scuffs and scratches. A cutting configuration that is both practical and effective is made possible by the use of a rotary cutter & cutting mat.
Portable & Convenient
Rotary cutters are portable for sewing and quilting on the fly since they are light and simple to carry. A rotary cutter is portable and may be used anywhere you need it, whether working in various rooms of your house, visiting a retreat, or both.
It’s crucial to remember that rotary cutters feature a sharp blade and must be handled carefully. To avoid mishaps or injuries, always adhere to the manufacturer’s instructions, store the blade securely, and keep it covered while not in use.
Frequently Asked Questions
Why is my rotary cutter not cutting?
Make sure the blade is properly inserted into the rotary cutter once again. Problems may result if the washer is applied properly or the bolt is tight enough. Additionally, confirm that you completely cleared the lint and fluff from the rotary cutter’s tight spaces.
What kind of rotary cutter needs to use for pattern cutting?
Although there are other rotary cutter varieties, the most popular one is a typical rotary cutter with a straight blade. Because it produces neat, straight lines, this kind of cutter is appropriate for cutting patterns.
What other equipment do I need to use on the rotary cutter?
A self-healing cutting mat, a ruler, or a quilting ruler is also necessary for addition to a rotary cutter to preserve your work area and guarantee precise measurements.
Can a rotary cutter cut patterns?
Laying the fabric & pattern on your mat, placing weights on top, and tracing the blade along the design’s edges with your rotary cutter are all required to cut out a sewing pattern.
Can you make clothes using a rotary cutter?
Rotary cutters are useful for dressmaking and cutting precise strips and shapes. It would be best to experiment to see how many you can cut simultaneously without losing precision. They make it simple to cut layers of cloth together.
Final Words
Your sewing and crafts experience may be significantly improved by using a rotary cutter to cut patterns. You may produce accurate and efficient cuts and more completed products with a more polished appearance by adhering to a few key measures and keeping safety in mind. Remember to choose the right rotary blade type and cutter size for your particular cloth and design. You may rapidly and accurately cut patterns for various sewing and crafts tasks with the help of the rotary cutter with a little expertise and attention to detail. Do you want to learn how to renovate a kitchen? Click Here!
