Are you planning to makeover your cabinets through painting? Cabinet painting is one of the keys to upgrading the aesthetics of your house. But did you know that painting your cabinets or cupboards is also one of the most complicated tasks in house renovation and remodeling? This is because there are lots of DIYers who tend to skip one crucial step: Sanding! So the question is, are they doing it right or not? Let’s find out.
Importance Of Painting The Cabinets
If you are thinking of altering the look of your home, then painting cabinets is one of the best options that you can go for. Painting cabinets bring a new look to your home and make it more beautiful than before. Here are the main explanations for why you should opt for this method.
🟩 Cost-effectiveness
Painting your cabinets can be cheaper than buying new ones or even remodeling the entire kitchen. A whole new set of cabinets can cost several thousands of dollars, but simply painting yours will cost around $100 per door. If you’re replacing your kitchen flooring, this won’t really help much. But if you’re just looking for an easy way to improve the look of your kitchen on a budget, then this is perfect for you!
Painting your cabinets will also save time and effort compared to replacing them. You won’t have to remove all those heavy doors from their hinges (and then put them back later), move any other furniture out of the way while doing so (and then reinstall it afterward). Plus, there’s no need to wait until they’re done being replaced before moving back in.
🟩 Changes the looks
Painting cabinet doors is a great way to change the look of your kitchen, bathroom, bedroom, or living room. The color of a cabinet door can completely change the overall feel of the room. It’s easy and quick to paint them yourself with some basic supplies from Home Depot or Lowes.
When painting cabinets, make sure you use high-quality paint that dries quickly so that you can get back to enjoying your home.
🟩 Gives a new look
Painting the cabinets can give a new look to your home. You can paint them in any color you like and use different colors for different rooms. For example, you may have a kitchen that is white and black, while another room has brown cabinets. You can also use a different design on each cabinet, such as painting one with flowers while another has stripes or polka dots.
You don’t have to stick with just one design either: you could even paint each wall differently! If you’re feeling adventurous, try mixing up your paint colors by doing something like having half of the walls red while the other half is blue (or whatever). This will cause people walking past your house to stop for a while and wonder how much time was spent painting this place!
🟩 Enhances the beauty of your home
The best way to enhance the beauty of your home is by painting the cabinets. It is a very efficient and cost-effective way of making a change in your house’s appearance. In most cases, you will find that this is one of the cheapest ways of making changes in your house. This can be done as soon as you buy a new house or when you move into an old home that needs some sprucing up.
You can choose from different colors and textures depending on what kind of look you want for your cabinets. You can also give them an antique vibe by using an old-fashioned style like stripes or chevrons. Especially if you want something unique for your kitchen décor instead of following trends. This is because there are no rules when it comes down to choosing colors & styles: so just have fun with it!
🟩 Increase the value of your home
Painting your cabinets is an investment that will pay off in the long run. The average cost to paint a kitchen is around $1,500. However, according to some home experts, you can expect your resale value to increase by up to 10% after painting cabinets or even more if you choose a bold color like red! If you’re looking for something even bigger than a 10% return on investment, then painting the inside of those cabinets is your best bet!
Now that you know how massive the impact of painting your cabinets is, it’s time to start doing it. But, wait! Before you grab your brush and start stroking, did you know that there is a procedure called “sanding”? Check the next section.
What Is Cabinet Sanding?
Cabinet sanding is the process of removing unwanted marks and textures from the surface of a cabinet. You can do this by hand or with a power sander. You can choose to remove all of the finish from your cabinets or just some of it. Cabinet sanding is often part of a larger project, such as refinishing furniture or floors.
Cabinet sanding is a great way to get rid of the wear and tear that may have accumulated over time or to reduce the amount of damage that occurs when you move into a new home with old cabinets.
This is also useful if you want to change the color of your cabinets. You can strip off the old paint or stain and apply a new finish, as well as remove any scratches and dents from daily use.
Methods Of Sanding
How do you choose which method of sanding is right for you? There are many different ways to finish this job, each with its own pros and cons. In this blog section, we’ll go through the most popular methods of sanding and tell you what they’re best used for!
🟩 Manual Sanding
Manual sanding is the most common and oldest sanding technique. You can do this method by hand, and it involves no equipment other than a sandpaper piece. In this technique, you’ll also need to change the position of your arm every now and then so as not to strain yourself or tire out too quickly.
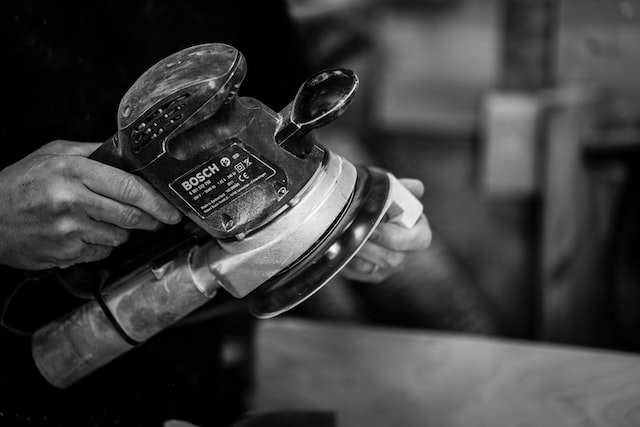
🟩 Power Sanding
Power sanding is one of the most efficient ways to sand. It is also one of the most popular methods in small workshops and large industrial projects.
Power sanders are perfect for when you need to quickly get a lot of work done, such as when you are working on a large-scale project like refinishing your deck or siding on your house. These tools can be used to strip away old paint and finish, or they can be used to level out uneven surfaces before applying new materials.
Power sanding machines are actually quite similar to electric drills and circular saws. Still, instead of using discs or blades, they use abrasive discs made from different materials like aluminum oxide, silicon carbide, or aluminum oxide with garnet crystals that grind away at the surface being worked on until it reaches an evenness desired by the user.
🟩 Electric Sanders
Electric sanders are versatile tools that can be used for leveling wood and other materials so that they become extremely smooth. These tools are powerful in nature and perfect for large-scale work in different industries, including carpentry and construction.
Electric sanders have been around for many years. They are still considered one of the best methods to get rid of rough spots on surfaces like uneven floors or walls. Using an electric sander will help you save time and money as it can finish your project faster than by hand alone.
Advantages Of Sanding Before Painting
Sanding is a crucial part of the painting process, but it’s also something that many people don’t do correctly. In this section, we’ll go over why you should always sand before painting, what tools are best for the job, and more!
🟩 Achieves better adhesion
Sanding is the first step in the painting process. Sandpaper is usually for smoothening out the surface of the wood, and the smoother it is, the better your paint will adhere to it.
If you have a piece of furniture made from wood that has been painted several times over the years, you may find that it’s time for sanding. This can be done with a hand sander or an electric sander, depending on how much work needs to be done.
You’ll know that sanding is essential because there are bubbles under your paint where moisture can’t escape between layers of different colors or materials (such as glass). The other main reason why you would need to sand before painting again will be if all layers have been removed, so there isn’t anything left underneath except the bare surface. This means nothing else will adhere properly anymore!
🟩 Allows the wood to soak up paint
In order to allow a surface to soak in paint, it needs to be free of dirt and oils. The sandpaper will remove these from the surface so that the wood can soak up as much of your paint as possible. This also helps with coverage, as you will have more complete coverage of the wood if there is less buildup on it.
🟩 Removes dirt and oil
Sanding before painting can remove dirt and oil from the surface of the wood. These contaminants can prevent paint from sticking to the wood, and they make it much more difficult to achieve a smooth finish. This is especially true if you intend to use an oil-based stain or varnish on your project. Any leftover dirt or grime would leave a visible residue that would be difficult or impossible to remove later.
In order to properly sand before painting, use either a hand sander or a power sander with fine-grit sandpaper (80-120). You will want to use enough pressure so that you feel some resistance while sanding. If you’re too gentle, then this step won’t do its job! The main goal here is just getting off excess pigments from old projects so that your new coatings will be able to adhere well.
🟩 Levels out imperfections in the wood surface
Sanding levels out imperfections in the wood surface. By smoothing out these imperfections, you’re creating a smooth surface for the paint to adhere to. If you don’t do this step, you could end up with a bumpy finish that would show through your paint job and make it look cheap or poorly done.
🟩 No grooves for moisture to enter
Not only does sanding remove any dirt or oil that may be on the surface, but it also levels out imperfections in the wood. When you paint without sanding, there’s a chance that moisture can get inside those imperfections and cause your paint job to peel off. It’s also important to remember that sanding smooths out rough edges so they won’t chip or peel after your project.
Disadvantages Of Sanding Before Painting
Sanding is a big part of any painting project. You need to sand before you paint in order to get a smooth finish and ensure that your new coat adheres properly. But there are some disadvantages to sanding before painting that may make you wonder if it’s worth the effort, especially when you’re dealing with all-over surfaces like walls or ceilings.
🟩 A messy process
Sanding is messy and can cause serious health hazards. The sanding process creates a lot of dust, which will stick to everything it touches. Not only could this be an eyesore in your home, but the dust can also be quite harmful to your respiratory system if inhaled.
It’s not uncommon for those who are sensitive or allergic to dust or other allergens to experience irritation when exposed to large amounts of airborne particles like these during a project like painting walls and ceilings. The general consensus is that when working with sandpaper or finishing nailers, in particular, you should use some sort of face mask in order to protect yourself from these potentially harmful substances.
🟩 It can take a lot of time
Sanding is a laborious task, and it can take a lot of time. If you don’t have the right tools, it may be difficult to sand effectively. You will need to sand the entire surface before painting. There is no way around this. If you don’t, then any imperfections in your project will show through when it comes time for painting.
Worse yet, if you don’t sand correctly and end up with uneven surfaces or high ridges and low valleys (where one section of paint is thicker than another), then it will be impossible for your primer or top coat of paint to adhere properly.
🟩 Uneven surfaces
Depending on what you sand, you’ll find that sanding down the original surface will make it uneven. The paint won’t be applied evenly, and you’ll get some spots that look patchy or have an uneven finish.
Sanding also makes it easy for the paint to flake off because it doesn’t have a smooth base to adhere to. This can happen years later when you least expect it.
In addition, if you’re not careful about how much sanding you do before painting over your walls, then your surfaces may crack as they dry out due to changes in temperature and humidity levels throughout the year (especially after exposure).
🟩 Longer drying time
If you’re not careful, you could be in for a lengthy wait. After painting, your surface needs time to dry completely before it’s ready for sanding. Once that first coat has dried, give your project another 24-48 hours before sanding again. When you’re done with that step and ready to move on with the project, let it sit for at least 48 hours before applying another coat of paint.
In short: if you want a smooth finish on your project after painting, prepare yourself for a wait!
Can You Paint Cabinets Without Sanding?
Yes, you can paint cabinets without sanding them.
The only thing you’ll need to do is prep the surface. This means cleaning it and removing any stains with a deglosser and then applying primer. You can use an oil-based primer or an acrylic-based one. If you’re using an oil-based primer, which we recommend because it lasts longer, make sure that it’s not too thick, or else it won’t dry properly.
Once the primer has dried, you can apply your paint of choice. Be sure to let each coat dry in between applications!
Frequently Asked Questions
🟥 Can you paint over stained wood without sanding?
You can paint over stained wood without sanding, but the process is a little different.
When painting over stained wood, you need to make sure that your primer is compatible with the stain. For example, if you used oil-based stain on raw wood and want to go over it with latex paint, you’ll need an acrylic primer. If you want to use oil-based paints or epoxy finishes over polyurethane varnish or lacquer finishes, then waterborne polyurethanes are best for this job.
🟥 Can you paint over varnish without sanding?
If you’re using shellac or lacquer, yes. These finishes are not as hard as varnish, so they’ll be easier to get through with a brush or roller. You may want to sand them down first, so they’re not too thick and clumpy.
However, suppose your piece has a polyurethane finish (commonly called “poly”). In that case, the answer is no. Polyurethane takes much longer than other types of finish to dry up enough for the paint to stick to it. You can still do it, but it might take weeks instead of days or hours!
🟥 How do you get heat stains out of wood without sanding?
Heat the stain with a heat gun until it melts. This can be done by holding the heat gun about 6 inches away from the stained area and fanning the area back and forth with it. Wipe off the excess melted stain with a clean rag or cloth until you’ve removed most of it. Repeat this process as many times as necessary. Taking care not to overheat the wood or allow yourself to receive distractions so that you accidentally burn parts of your furniture!
Final Words
Just because you don’t have access to sandpaper doesn’t mean that you can’t still get the smooth finish you want when painting your cabinets. Of course, there will be some benefits and disadvantages of skipping the sanding part. But, if you are focusing on the aesthetic part of your cabinets, this will all depend on your creativity with the right tools.
After painting your cabinets, it’s time to divide them. Click here to know how.

